Passport’s ‘More’ menu is where you can leverage some of the device’s more advanced features. These include:
- Adding multiple sub-accounts to separate different stacks of Bitcoin without needing to manage additional seeds or passphrases
- Applying a passphrase, or multiple passphrases to create different wallets
- Applying temporary seeds to interact with entirely different wallets without needing to use a passphrase or erase Passport’s master seed

New Account
Adding additional accounts is a great way to manage separate stacks of Bitcoin using a single device and seed.
When adding new accounts to Passport, the device will require two pieces of information:
- The account number - Passport will automatically increment these, but you are free to choose your own
- An account name - It is good practice to name the account in line with its purpose. Eg ‘Business’ or ’noKYC’
Additional accounts are accessed by scrolling left along the top level menu structure and can be removed at any time from the Manage Account . Once created, each new account must be paired with your preferred software wallet.
From Passport firmware version 2.3.0, account views are context specific based upon the currently active passphrase. Example - If you apply the passphrase 123abc and within that passphrase protected wallet, you add account #1 and name it Mom’s Savings, you’ll only ever see that account configuration when the passphrase 123abc is entered onto Passport.
This video shows you the steps required to create and manage multiple Bitcoin accounts with a single Passport connected to Envoy.
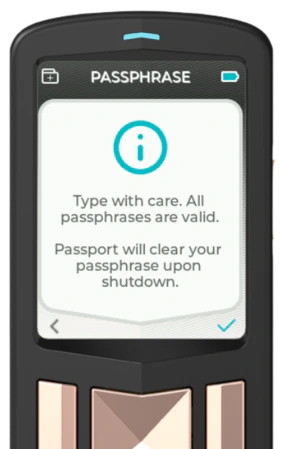
Enter Passphrase
For increased plausible deniability from physical attack, a passphrase can be applied to Passport. A passphrase acts as a second layer of security to protect your Bitcoin in the event that someone discovers your seed words. Multiple passphrases can be used with a single device as another method of segregating funds. Your passphrase is never saved to Passport, ensure it is safely backed up!
Applying a passphrase to Passport creates a new wallet that is completely independent of the default wallet created by your 12/24 word seed and will have its own unique list of accounts and receive addresses.
Passport will indicate a passphrase has been applied by showing a small ‘P’ inside a shield at the top of all account cards. The passphrase will remain applied to the device until:
- It is removed by clearing all text in the Enter Passphrase screen
- The device is powered off
Once a passphrase is applied, each account must be paired with the software wallet of your choice.
If you already have funds in a non passphrase protected account, then subsequently apply a passphrase and want to move your Bitcoin to the passphrase wallet, you must create a spend transaction to move the Bitcoin to a receive address from the new passphrase protected account.
This video shows you the steps required to apply a passphrase to your Bitcoin cold storage on Passport. You’ll then learn how to pair the passphrase protected wallet with Envoy, our mobile companion app.
Temporary Seed
Under normal usage, Passport generates and securely stores a single ‘master’ private key or set of seed words. The temporary seed function allows you to temporarily load a different seed onto the device. Once loaded, this enables you to perform all typical Passport related activity from the temporarily loaded wallet. This includes:
- Connect any account from the generated child seed to Envoy or other wallet software
- Verify addresses from the child seed accounts
- Sign transactions from any of the child seed accounts
Temporary seeds remain active on Passport until they are manually cleared from the device, or the device is turned off. When a temporary seed is active on Passport, all account screens will show an hourglass icon in the top right corner of the account card.
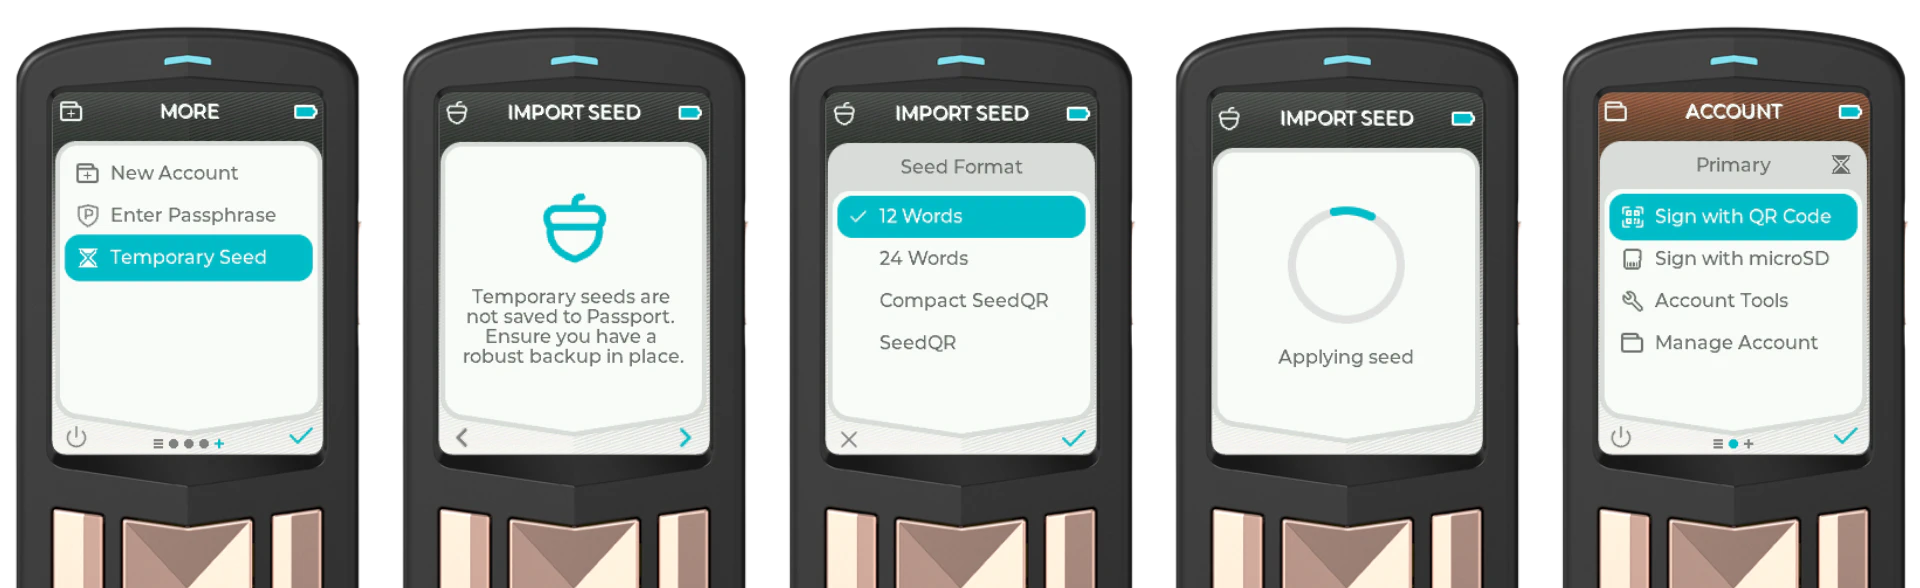
To clear a temporary seed from the device, scroll right to the ‘More’ screen and choose ‘Clear Temporary Seed’.
Advanced users can use Passport in full ‘stateless’ mode if desired. Simply erase any master seed from the device (after ensuring you have robust backups in place). After the device restarts, choose ‘Import Seed’ > ‘Temporary Seed’ and then import a seed to the device via text input or SeedQR. The temporary seed will remain active on the device until it is powered off. When the device is powered back on, you’ll be returned to the wallet create/import screen.