This page details all of the physical features of Passport Core and their respective use cases.
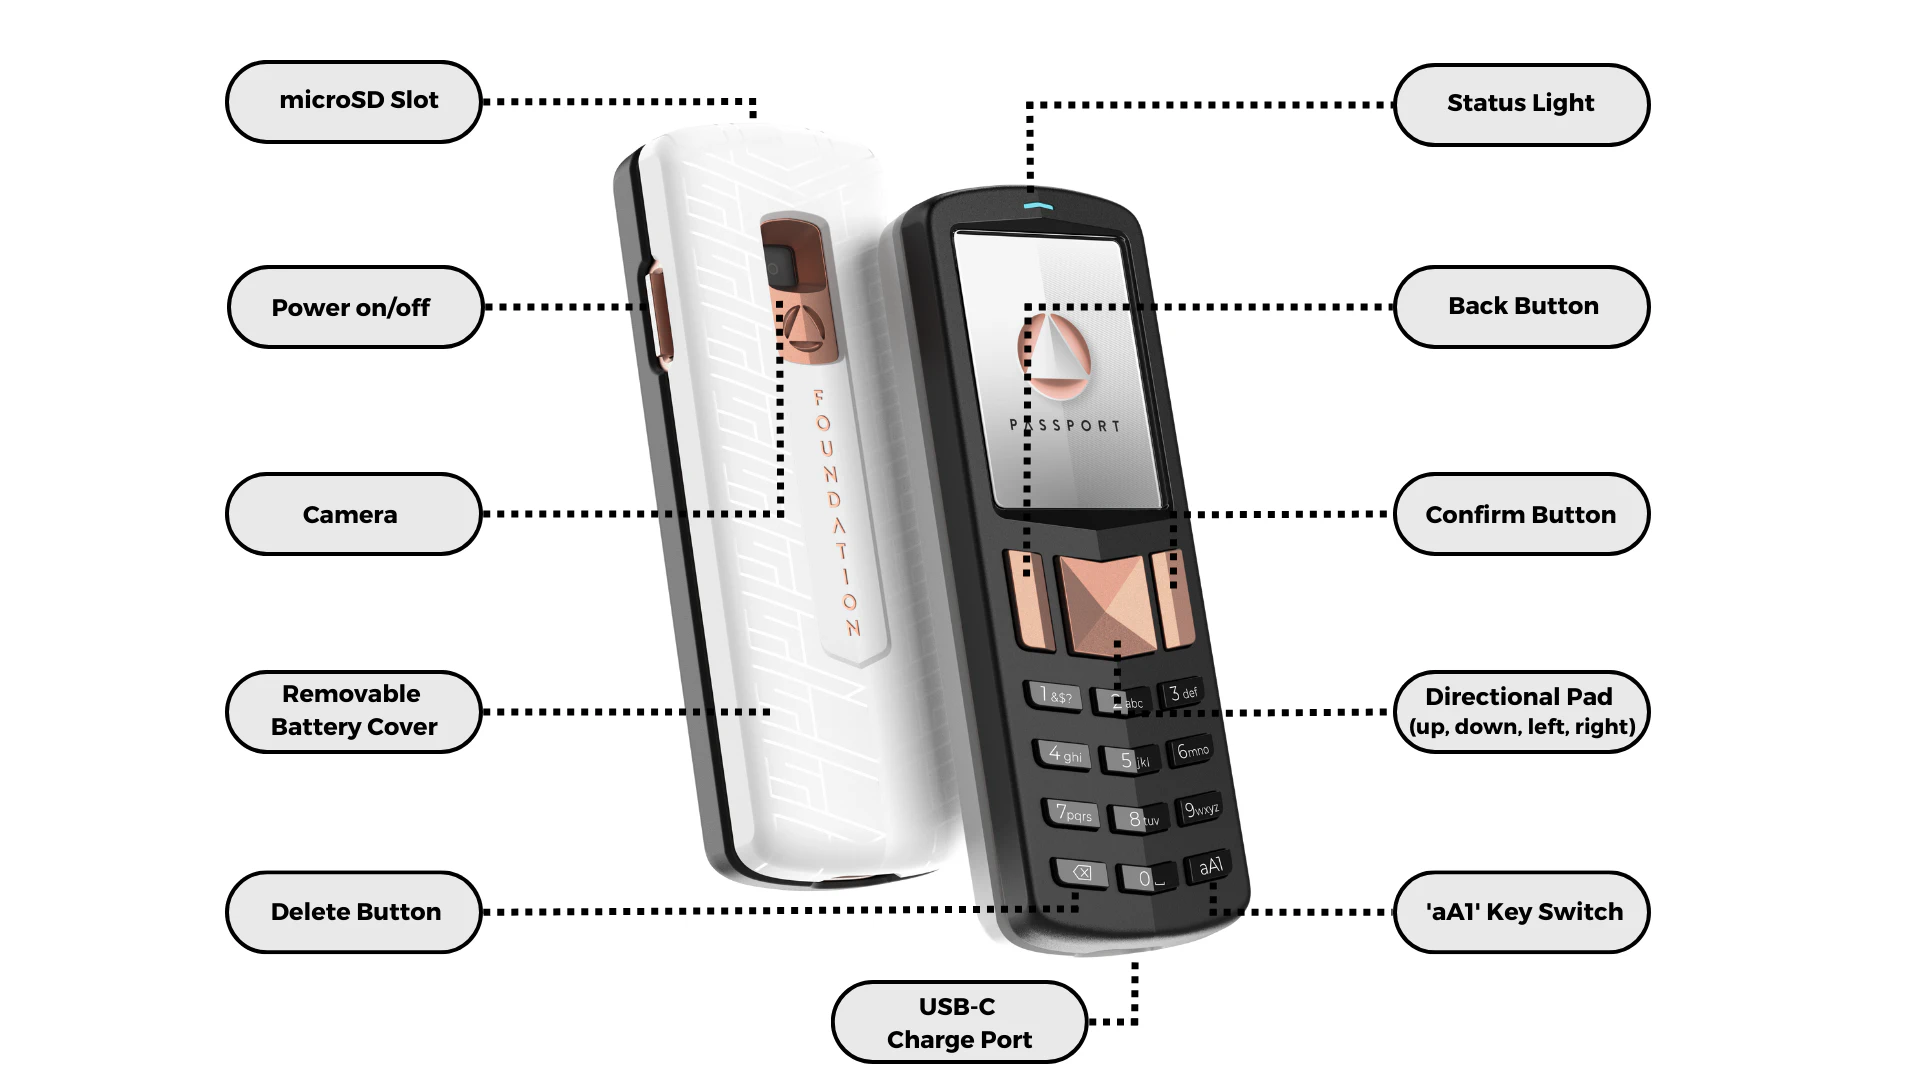
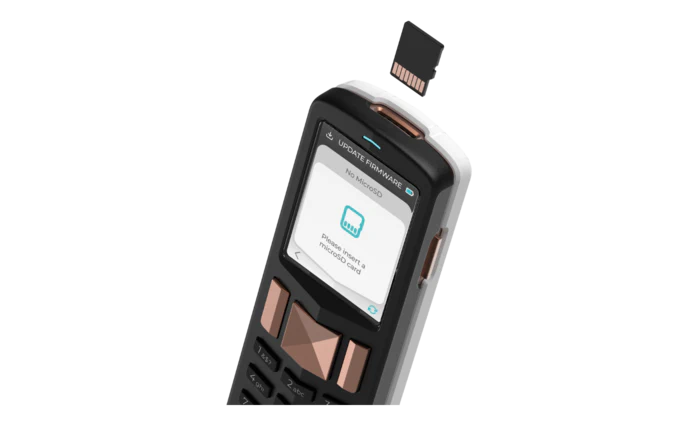
MicroSD Slot
The microSD card slot at the top of Passport Core can be used for passing firmware updates to the device. It can also be used to pass transaction information to and from Passport Core where a user does not want to sign via QR codes.
Always insert the microSD card in with the gold pins of the microSD card facing toward you.
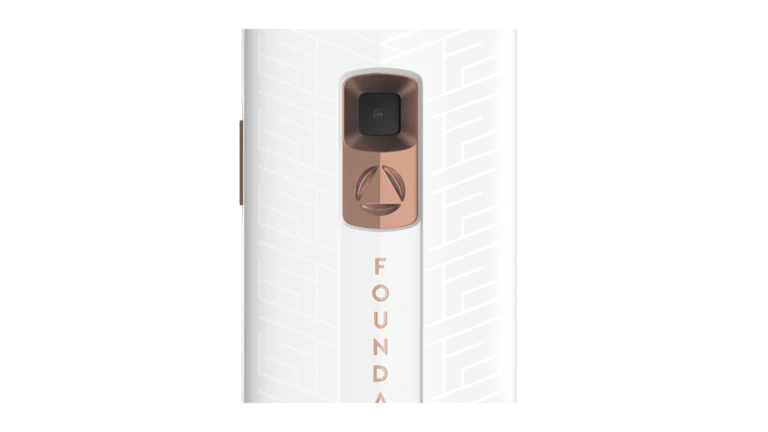
Power Button
The copper power button on the right side of Passport Core is used to turn the device on or off. To power the device on, hold the button down for 1s. Once powered on, pressing the button will give a shutdown option.
Camera
The camera at the back of the device has multiple uses:
- Scanning transaction information from wallet software
- Verifying addresses
- Performing a Security Check upon initial setup
- Importing multisig wallet configuration files
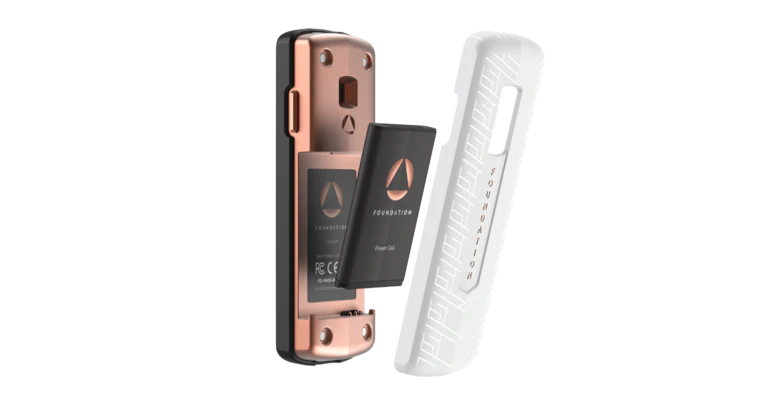
Rear Cover
The rear cover of the device is fixed in place with 4 magnets and can be removed easily with a gentle pull. Underneath you'll find Passport Core's standard form factor BL-5C rechargeable lithium ion battery, which can be easily removed by pulling gently from the top.
Delete Button
The delete button in the lower left corner of the keypad is used to remove entered characters on any number or text entry fields on Passport. This includes PIN, Seed and Passphrase entry, as well as Account and Multisig configuration name fields.
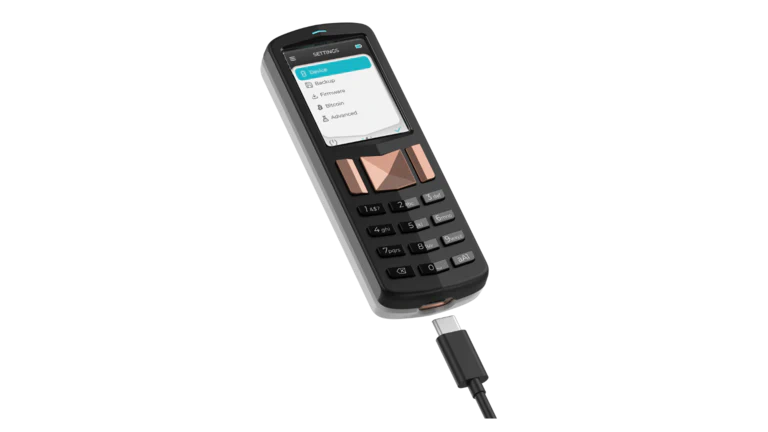
USB-C Charge Port
The USB-C port found at the bottom of Passport Core is for charging the device only. No data can be transmitted through this port, as the data pins required are simply not present. Passport Core comes packaged with a USB-C cable that can be plugged into most wall adapters to charge the device battery.
'aA1' Key Switch
The character key switch found in the lower right corner of the device is used for switching between the following character entry types:
- Lower case letters
- Upper case letters
- Numbers
When on any input screen, pressing this button will cycle between each option in turn to allow for any combination of inputs. The currently selected input method will be displayed on screen by the following characters.
a, A, or 1.
Directional Pad
The copper 'D-Pad' in the center of Passport Core is used for navigating through the Passport Core menu system.
Upon startup, Passport Core lands at the Primary Account, situated at the top level of the menu structure. From here users can press left on the d-pad to navigate to Settings, or right on the d-pad to access the 'More' menu to add additional accounts or passphrases. See here for a detailed breakdown of the Passport Core menu structure.
Pressing up or down will move to the next item on the current screen.
Confirm Button
The copper button on the right side of Passport Core is used to confirm a given input (e.g., PIN entry) or to move to the highlighted menu item.
Back/Shutdown Button
The copper button on the left side of Passport Core has two purposes. When situated on the top level of the menu system (Accounts, More or Settings), this button will act as a shutdown button that initiates a device power off. This is denoted by the small icon in the bottom left of the screen.
When in any sub menu or input screen, this button will act as a back button the moves the user to the previous screen. This is denoted by the small < icon in the bottom left of the screen.
Status Light
The LED at the top of the device is used to communicate status to the user. The light colors denote the following possible states:
- Blue - Normal operation
- White - Device is fully charged
- Orange - Device is powered off but being charged
- Red - Firmware error
A temporary red LED is expected when Passport Core is being powered on. This occurs while the device is validating the firmware. Once complete (1-2s) the LED should turn blue.