Envoy
Envoy is our mobile companion app for Passport Core, available on Android and iOS and designed to make everything you do with Passport Core simple. Envoy offers a streamlined device setup process and simple, privacy-preserving Bitcoin watch-only wallet.
Bitcoin Core
Bitcoin Core is the original Bitcoin node and wallet software. It offers a really simple way to get started running your own node and holding your own keys. Works beautifully with Passport Core too!
Bitcoin Safe
Bitcoin Safe is a new, but feature rich desktop wallet software with Passport Core compatibility.
Tutorial coming soon!
BlueWallet
BlueWallet is one of the easiest ways to get started with Passport Core without the need for a computer. Blue has an intuitive UI that makes interacting with your Passport Core wallets on the go a breeze.
BlueWallet Multisig
BTCPay Server
BTCPay is a self-hosted, open-source Bitcoin payment processor. It enables individuals and merchants worldwide to easily accept bitcoin without the need for trusted third parties and any fees whatsoever. We are proud to say that BTCPay is the tool we use at Foundation to allow our customers to purchase Passport Core with bitcoin.
Casa
Casa is a collaborative custody service that helps you self-custody your bitcoin and minimize single points of failure.
Electrum
Electrum Desktop is one of the longest standing desktop wallets in the Bitcoin space and offers great functionality with Passport Core.
Fully Noded
Tutorial coming soon!
Keeper
Bitcoin Keeper is a mobile wallet software that can be downloaded from the Google Play and iOS app stores. Keeper supports all major hardware wallets and offers intuitive DIY single and multisignature wallet coordination. Keeper also supports single hot wallet functionality and own node connections.
Single sig video coming soon!
Keeper Multisig
Keeper Setup
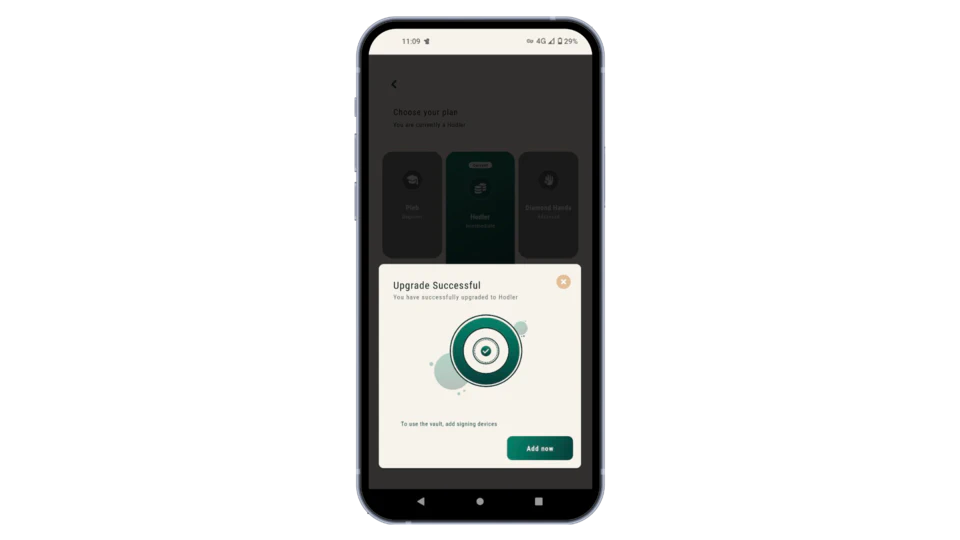
- Tap Start New
- On the next screen, tap 'Pleb' in the top left corner and change your plan to 'Hodler'
- Tap Add Now
Connect Passport Core with Keeper
On Keeper
- Choose Add 1st Signing Device
- Choose Foundation from the list, then tap proceed
On Passport Core
- Navigate to the account you want to connect, then choose Manage Account > Connect Wallet > Keeper > Multi-sig > QR code
- Present the animated QR codes being displayed by Passport Core to the camera on your phone
On Keeper
- Add the other two keys. These can be additional Passport Core's or any other key type from the compatible list in Keeper
- After the vault is created, tap on Passport from the displayed key list
- Choose Advanced Options > Manual Registration
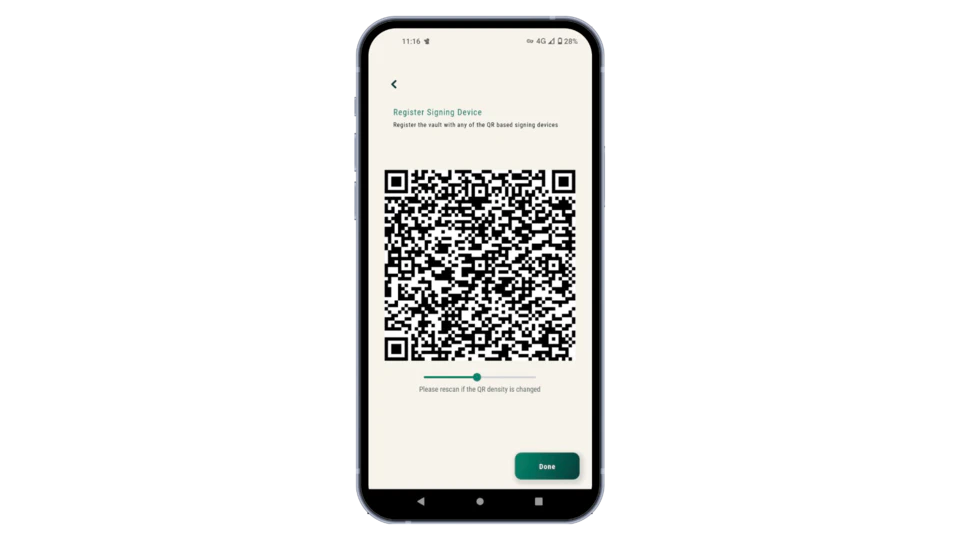
On Passport Core
- Scan the animated QR codes being displayed by Passport Core
- Confirm the multi-sig wallet details on Passport Core to finalize the import
On Keeper
- Navigate back to the main vault screen and tap Receive
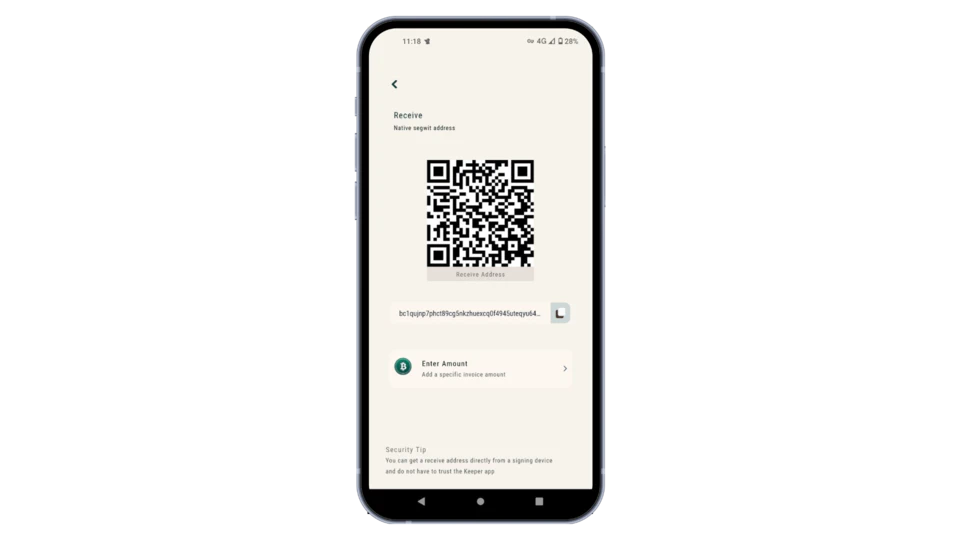
On Passport Core
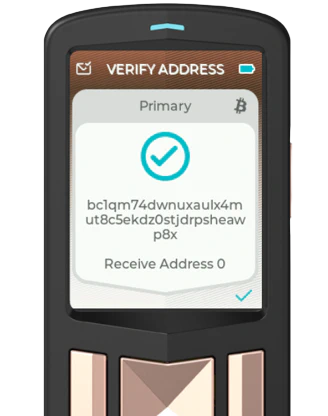
- Scan the receive address QR code being displayed by Keeper and look for a teal colored check mark to confirm successful connection
On Keeper
- From the main vault screen, tap Settings > Generate Descriptors
- Save a copy of this on an SD card or USB drive somewhere secure. Common practice is to store a copy of this with each seed backup.
This file will help you reconstruct the multisig wallet in the event that you lose a key and it's corresponding seed backup.
Lily
Coming soon!
Nunchuk
Nunchuk is a mobile wallet software that can be downloaded from the Google Play and iOS app stores. Nunchuk supports all major hardware wallets and offers DIY, collaborative and assisted multi-signature offerings, the latter being a paid service with additional support and inheritance options.
Connect Passport Core with Nunchuk
On Nunchuk
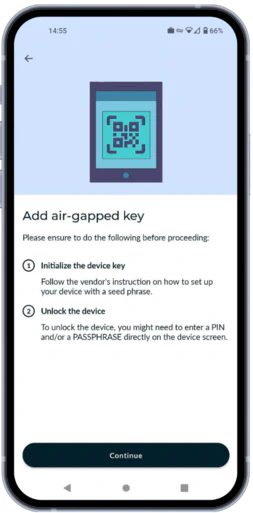
- Choose Add Key > Add air-gapped key, Continue
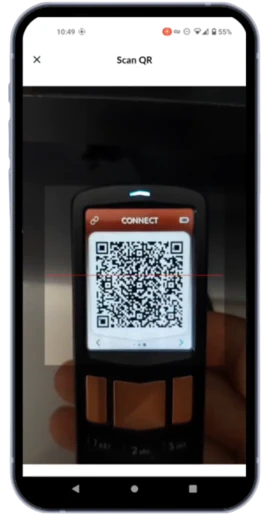
- Give the key a name like 'Passport Core', then choose Scan QR
On Passport Core
- Navigate to the account you want to connect, then choose Manage Account > Connect Wallet > Nunchuk > Single-sig > QR code
- Present the animated QR codes being displayed by Passport Core, to the camera on your phone
On Nunchuk
- Choose the path beginning m/84h, this represents Native Segwit, or addresses starting with bc1q.
- Tap Add Key and then Done on the following screen
- Tap Add Wallet > Create New Wallet
- Give the wallet a name such as 'Passport Single Sig' and leave the address and wallets types to default
- Select the Passport key to be used for this single sig wallet, then tap Continue
- Review the wallet details, then tap Continue again
- Optionally save your BSMS backup file
- Tap on the newly created wallet, then tap receive
On Passport Core
- Scan the receive address QR code being displayed by Nunchuk and look for a teal colored check mark to confirm successful connection.
Nunchuk Multisig
Simple Bitcoin Wallet
Simple Bitcoin Wallet offers a great mobile-first way to get started with Passport Core. Simple Bitcoin Wallet has an intuitive UI that offers users access to on-chain hot wallets, Lightning and QR enabled hardware wallets like Passport Core, in a single app.
Sparrow Wallet
Sparrow is a feature rich desktop wallet that acts as the perfect interface for Passport Core. Sparrow enables easy send/receive functionality plus advanced features like coinjoin + UTXO management.
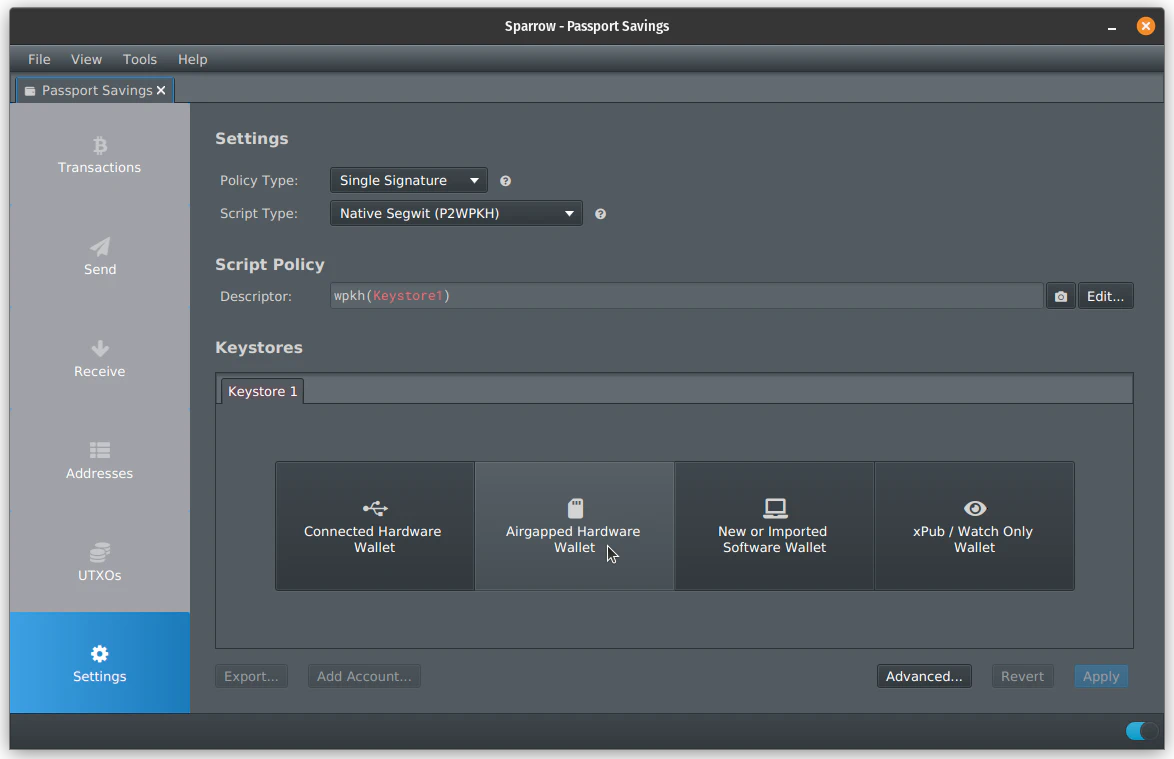
Connect Passport Core with Sparrow
On Sparrow
- Choose File > New Wallet, then give your wallet a name
- Choose Airgapped Hardware Wallet > Passport > Scan
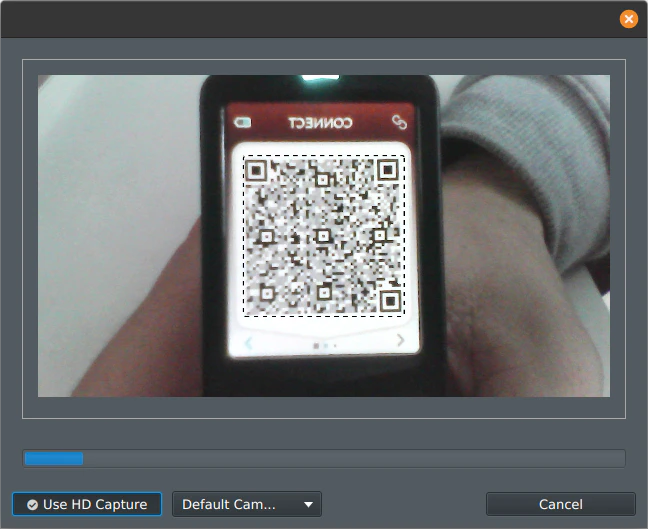
On Passport Core
- Navigate to the account you want to connect, then choose Manage Account > Connect Wallet > Sparrow > Single-sig > QR code
- Present the animated QR codes being displayed by Passport Core, to the camera on your computer
On Sparrow
- Click Apply, then set the optional password to the wallet file. This password is to prevent unauthorized people viewing your Passport Core accounts in Sparrow.
- Navigate to the receive tab on the left side bar
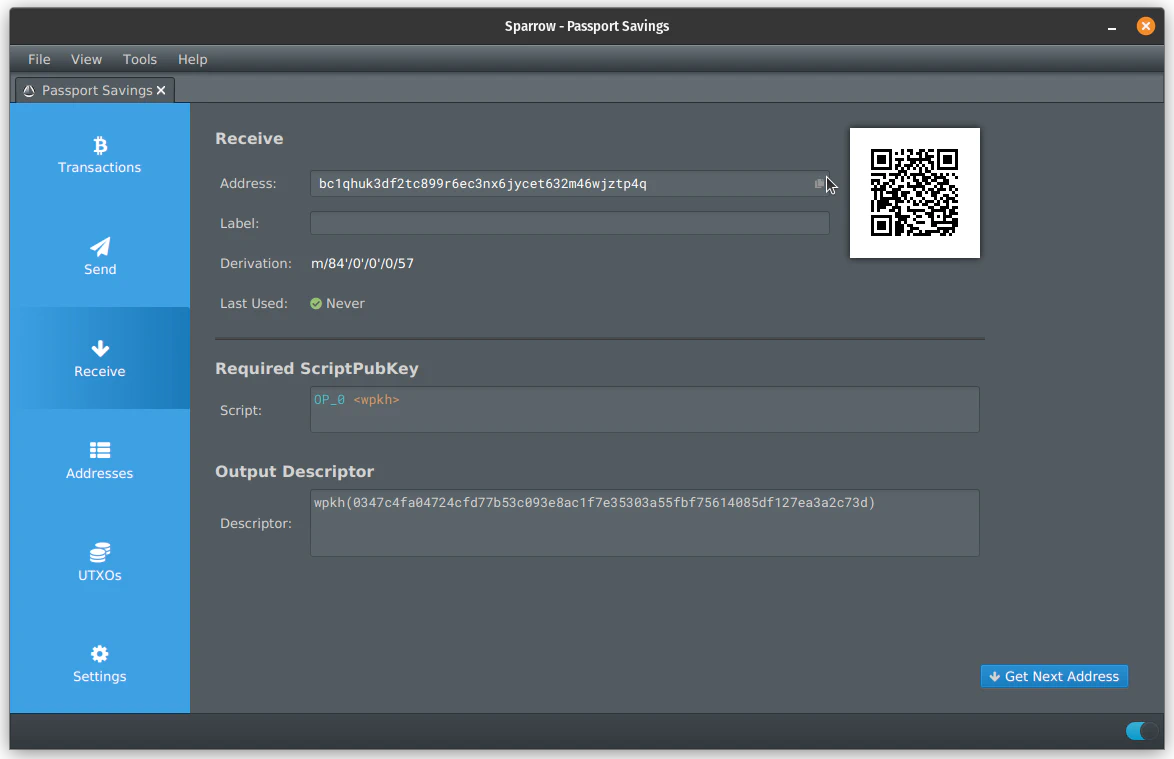
On Passport Core
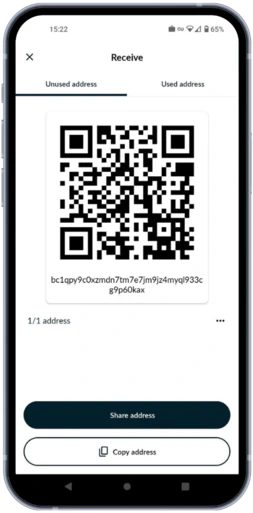
- Scan the receive address QR code being displayed by Sparrow
Sparrow Multisig
Specter Desktop
Specter Desktop offers one of the simplest desktop interfaces available and is a great companion for managing your Passport wallets.
Connect Passport Core with Specter
On Specter
- Choose Add new device > Passport
- Give the device a name eg 'Alice's Passport'.
- Choose Scan QR code
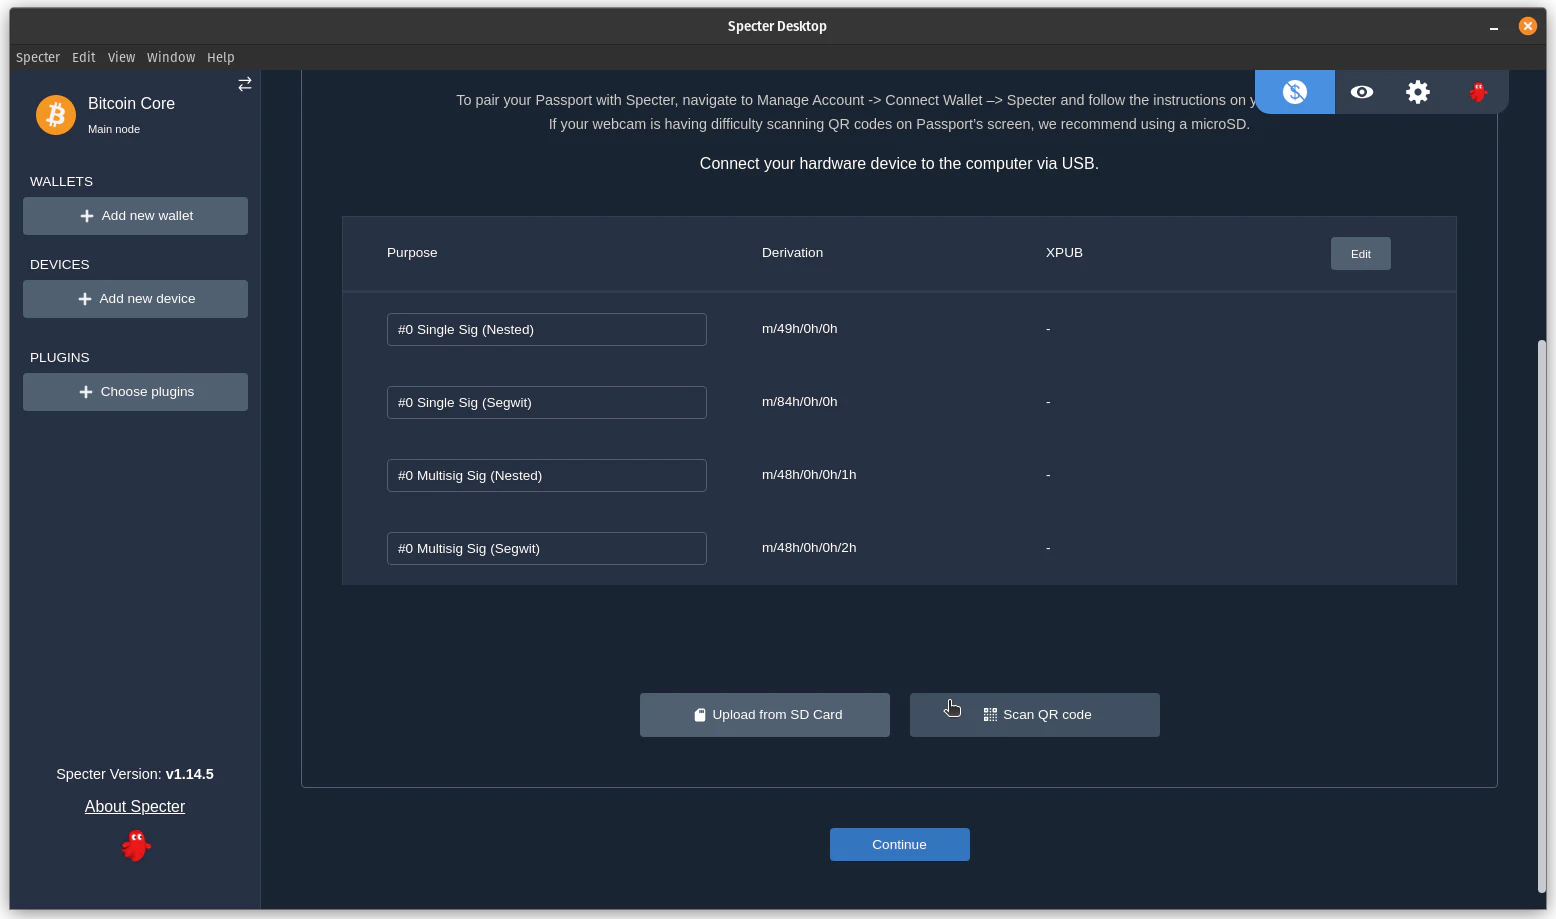
On Passport Core
- Navigate to the account you want to connect, then choose Manage Account > Connect Wallet > Specter > Single-sig > QR code
- Present the animated QR codes being displayed by Passport Core, to the camera on your computer

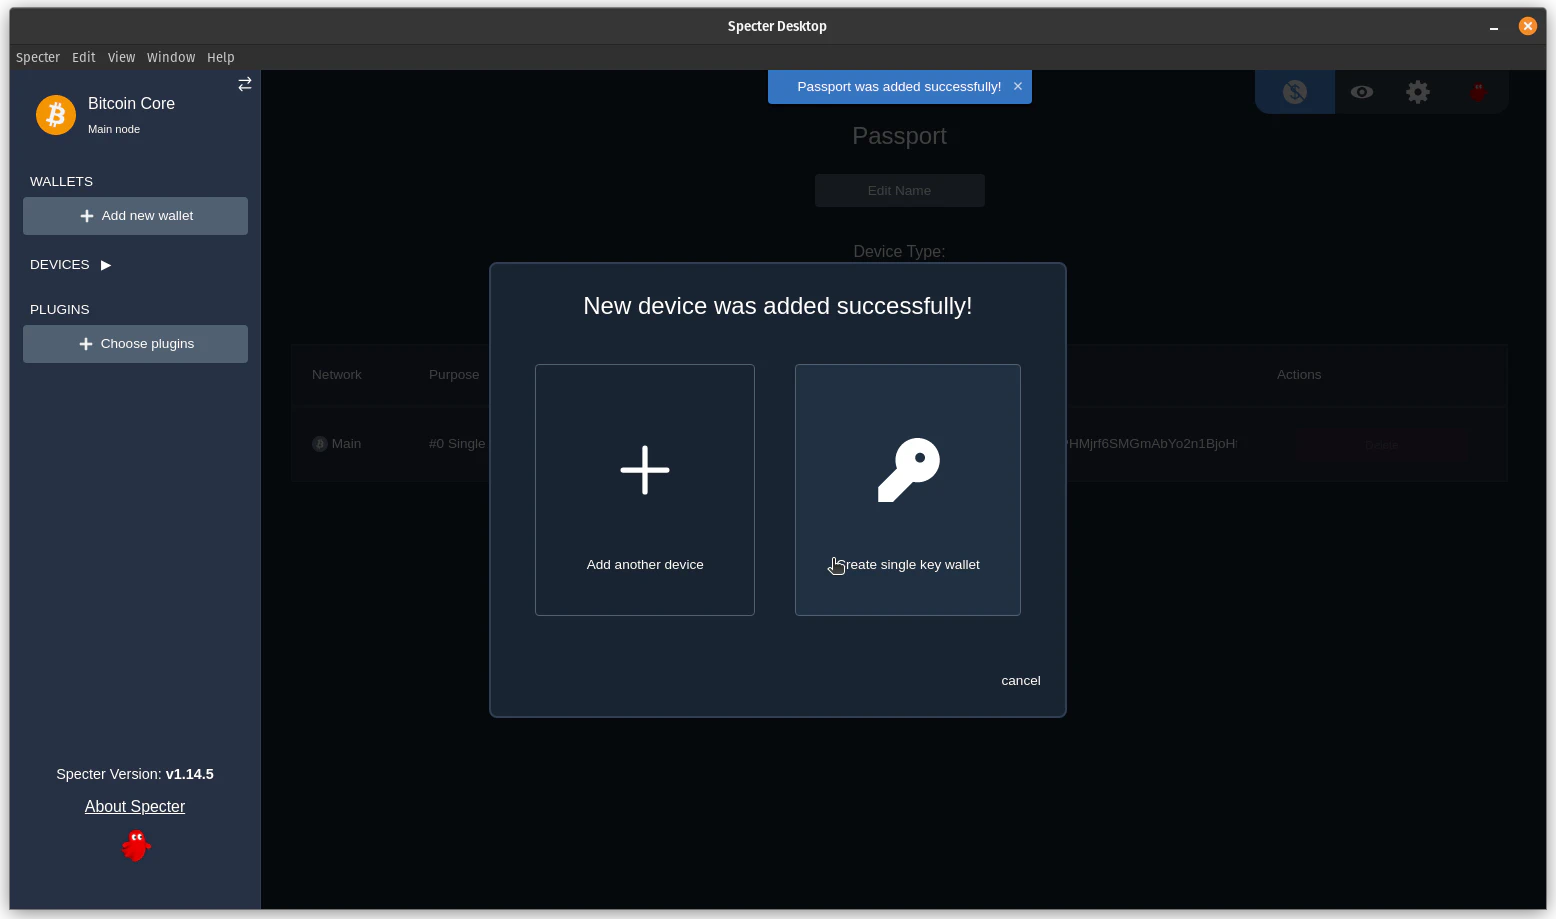
On Specter
- Click Continue
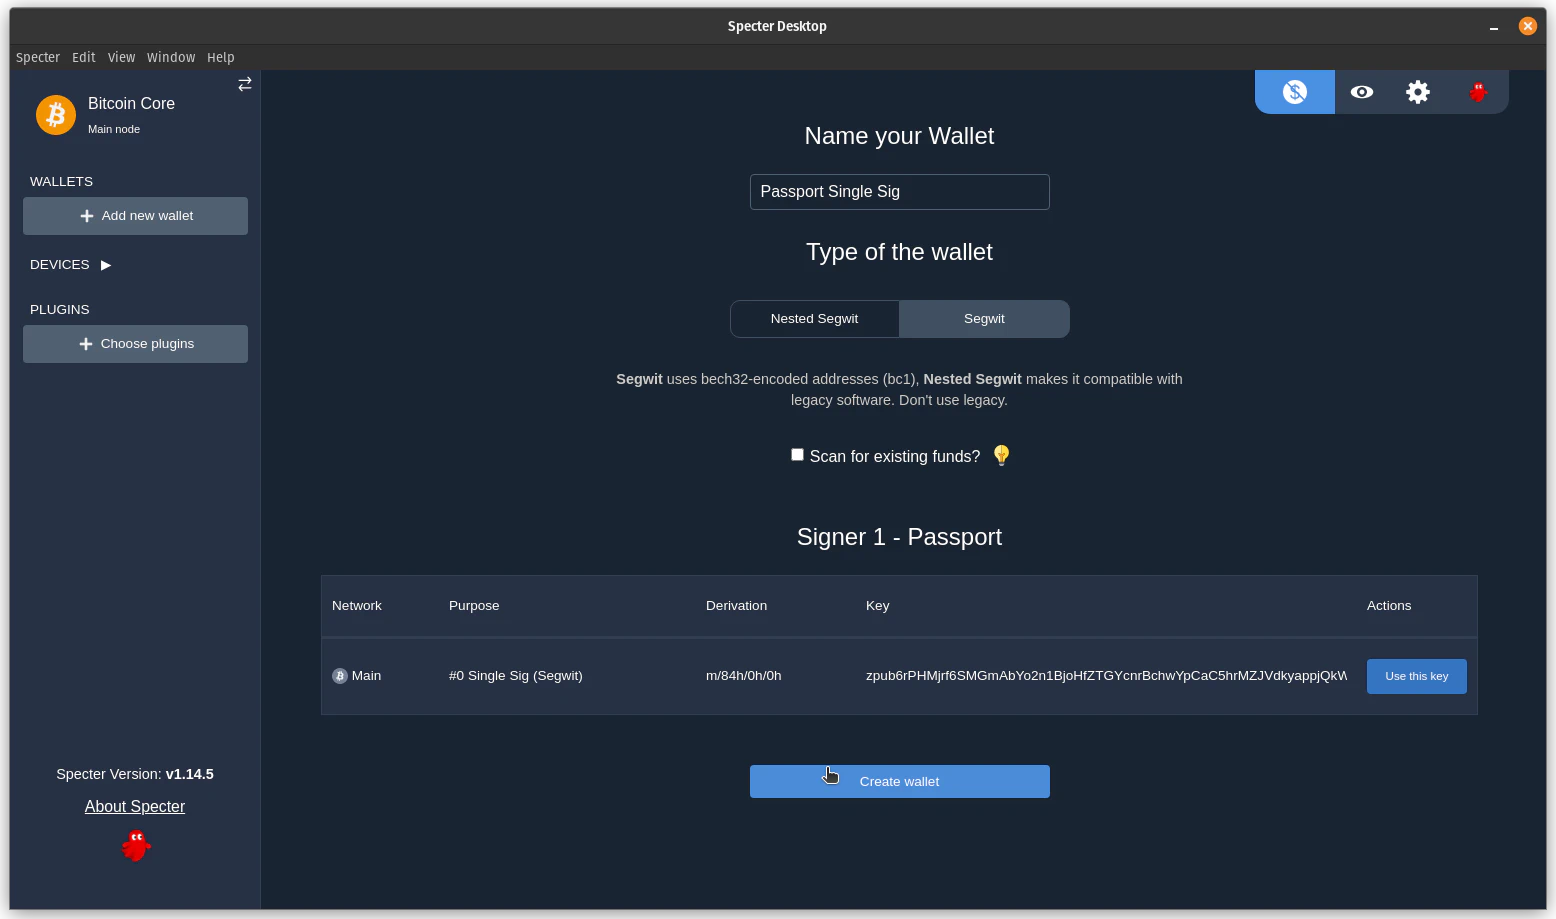
- Then choose Create single key wallet
- Give the wallet a name eg 'Passport Single Sig'
- Leave the type of wallet as 'Segwit'
- Check the 'Scan for existing funds?' box only if this is an existing wallet
- Then click Create wallet
On Passport Core
- Scan the receive address QR code being displayed by Specter
Specter Desktop Multisig
Zeus
Tutorial coming soon! In Zeus v0.9.0 there is a known issue where connected hardware wallet accounts cannot be deleted. You can track this issue here .